
Fiber optic networks demand precision and the right equipment for successful deployment. Professional installations require specialized fiber optic cable installation tools that can handle delicate glass fibers without compromising signal quality.
At Clouddle, we’ve seen how proper tooling makes the difference between flawless connectivity and costly rework. This guide covers the essential equipment and techniques that ensure your fiber infrastructure performs at peak capacity.
What Tools Do You Actually Need for Fiber Installation
Professional fiber installation requires three categories of specialized equipment that directly impact project success rates. Cable preparation tools form the foundation of any installation kit, with precision cleavers serving as the most critical component. The AFL Fujikura CT-30 desktop cleaver achieves cleave angles under 0.5 degrees and handles up to 48,000 cleaves per blade, which makes it the standard for fusion splice applications. Handheld options like the Corning FBC-002 work for field repairs but require significantly more skill to achieve consistent results.
Precision Cleaver Selection
Desktop cleavers deliver superior accuracy compared to handheld alternatives. The Fujikura CT-30 maintains consistent performance across thousands of cleaves, while pocket cleavers demand extensive operator experience. Specialized units like the Sumitomo FC-SE-AFC-08 offer preset cleave angles for mechanical splice applications. Ultrasonic blade cleavers minimize fiber damage through vibration technology, though they cost more than standard models.
Fusion Splice Equipment Investment
Fusion splicers represent the largest equipment investment, typically ranging from $15,000 to $40,000 for professional-grade units. Modern splicers like the Fujikura FSM-100P+ achieve splice losses below 0.02 dB for single-mode fiber and complete splices in under 10 seconds. Mechanical splice alternatives cost significantly less at $2-5 per connection but introduce higher insertion losses (averaging 0.3 dB compared to fusion’s 0.02 dB performance).
Testing Equipment Requirements
Optical Time Domain Reflectometers analyze fiber optic cable performance from end to end by testing components along the cable, including connection points, bends, and splices. Professional OTDRs from manufacturers like EXFO and Fluke Networks cost $25,000-50,000 but reduce troubleshooting time by 80% compared to basic power meters. Optical power meters serve as essential companions for insertion loss testing, with handheld units providing ±0.05 dB accuracy sufficient for most certification requirements.
Testing equipment represents 30-40% of total tool investment but prevents costly rework that averages $2,500 per failed connection according to Fiber Optic Association data. Once you have assembled your complete toolkit, the next step involves understanding how to execute each phase of the aerial fiber optic cable systems installation process systematically.
How Do You Execute Professional Fiber Installation
Successful fiber installation starts with comprehensive site documentation that prevents 95% of project problems according to Fiber Optic Association standards. Professional technicians map existing infrastructure, identify cable pathways, measure distances, and document environmental conditions before they touch any equipment. Site surveys must include precise measurements of cable runs, elevation changes, and access point locations.
Underground installations require utility marks through 811 services, while aerial routes need pole attachment permits and structural load calculations. The planning phase typically requires 2-3 hours per 1,000 feet of cable but saves an average of $3,200 per project in avoided rework costs.
Cable Installation Execution Standards
Professional installation demands strict adherence to manufacturer specifications to prevent signal degradation and cable damage. Fiber optic cables must never exceed their maximum pull tension of 600 pounds for standard single-mode cable, and technicians should monitor tension continuously with calibrated pull systems.
The minimum bend radius equals 20 times the cable diameter during installation and 10 times during operation. Cable should roll off spools rather than spin to prevent twists, and the figure-eight storage technique maintains proper cable geometry during intermediate pulls. Vertical installations require slack management every 150 feet to accommodate thermal expansion (with standard practice allowing 2.5 feet of sag per span).
Testing and Certification Requirements
Post-installation testing follows a four-stage protocol that validates performance at each completion milestone. Initial continuity testing confirms fiber integrity immediately after cable placement, followed by insertion loss measurements with calibrated optical power meters that provide ±0.05 dB accuracy.
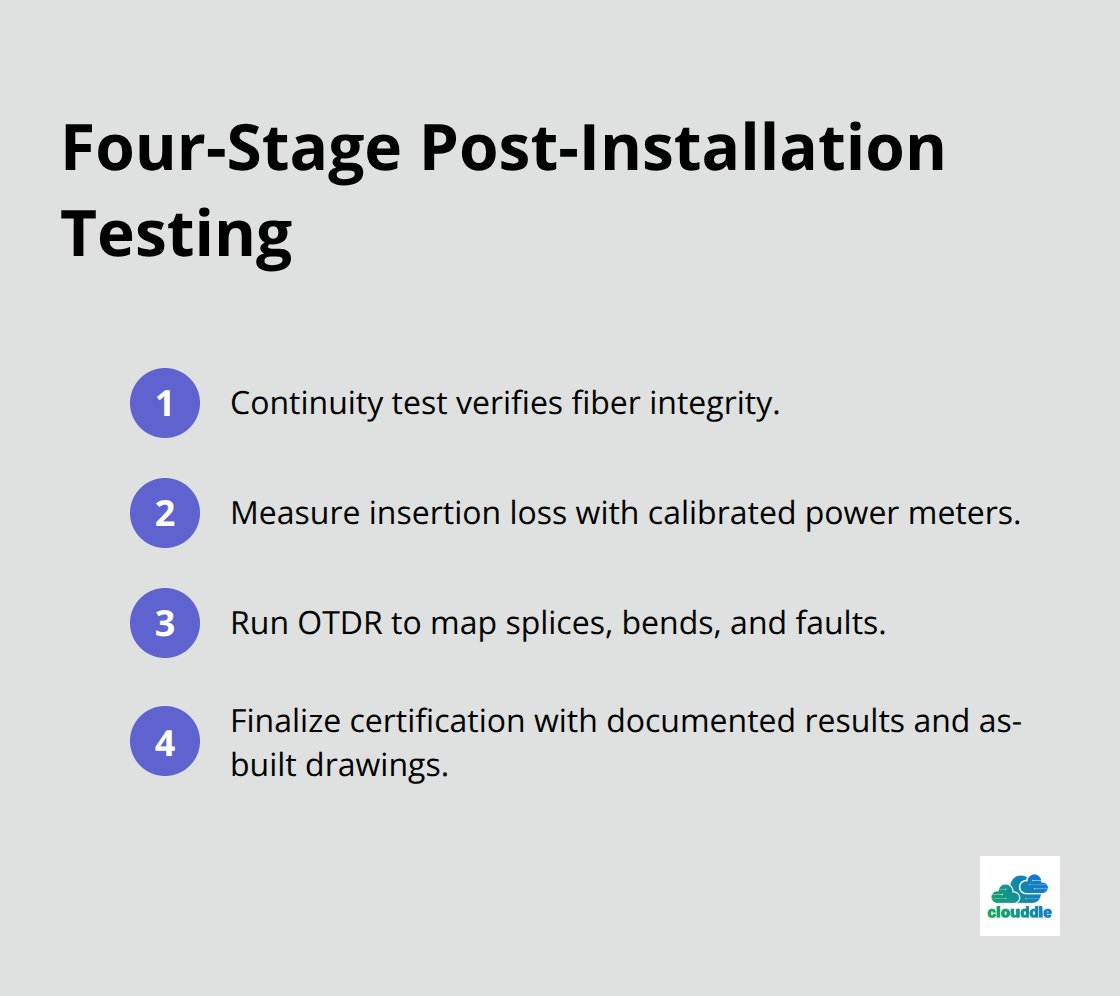
OTDR testing maps the entire cable run to identify splice locations, bend losses, and potential failure points. Final certification requires documentation of all test results, splice records, and as-built drawings that meet industry standards. Professional installations achieve first-pass certification rates above 98% when proper testing protocols are followed (compared to 60-70% success rates for installations that skip intermediate testing phases).
Even with perfect planning and execution, fiber installations present unique challenges that can derail projects and increase costs significantly.
What Causes Most Fiber Installation Failures
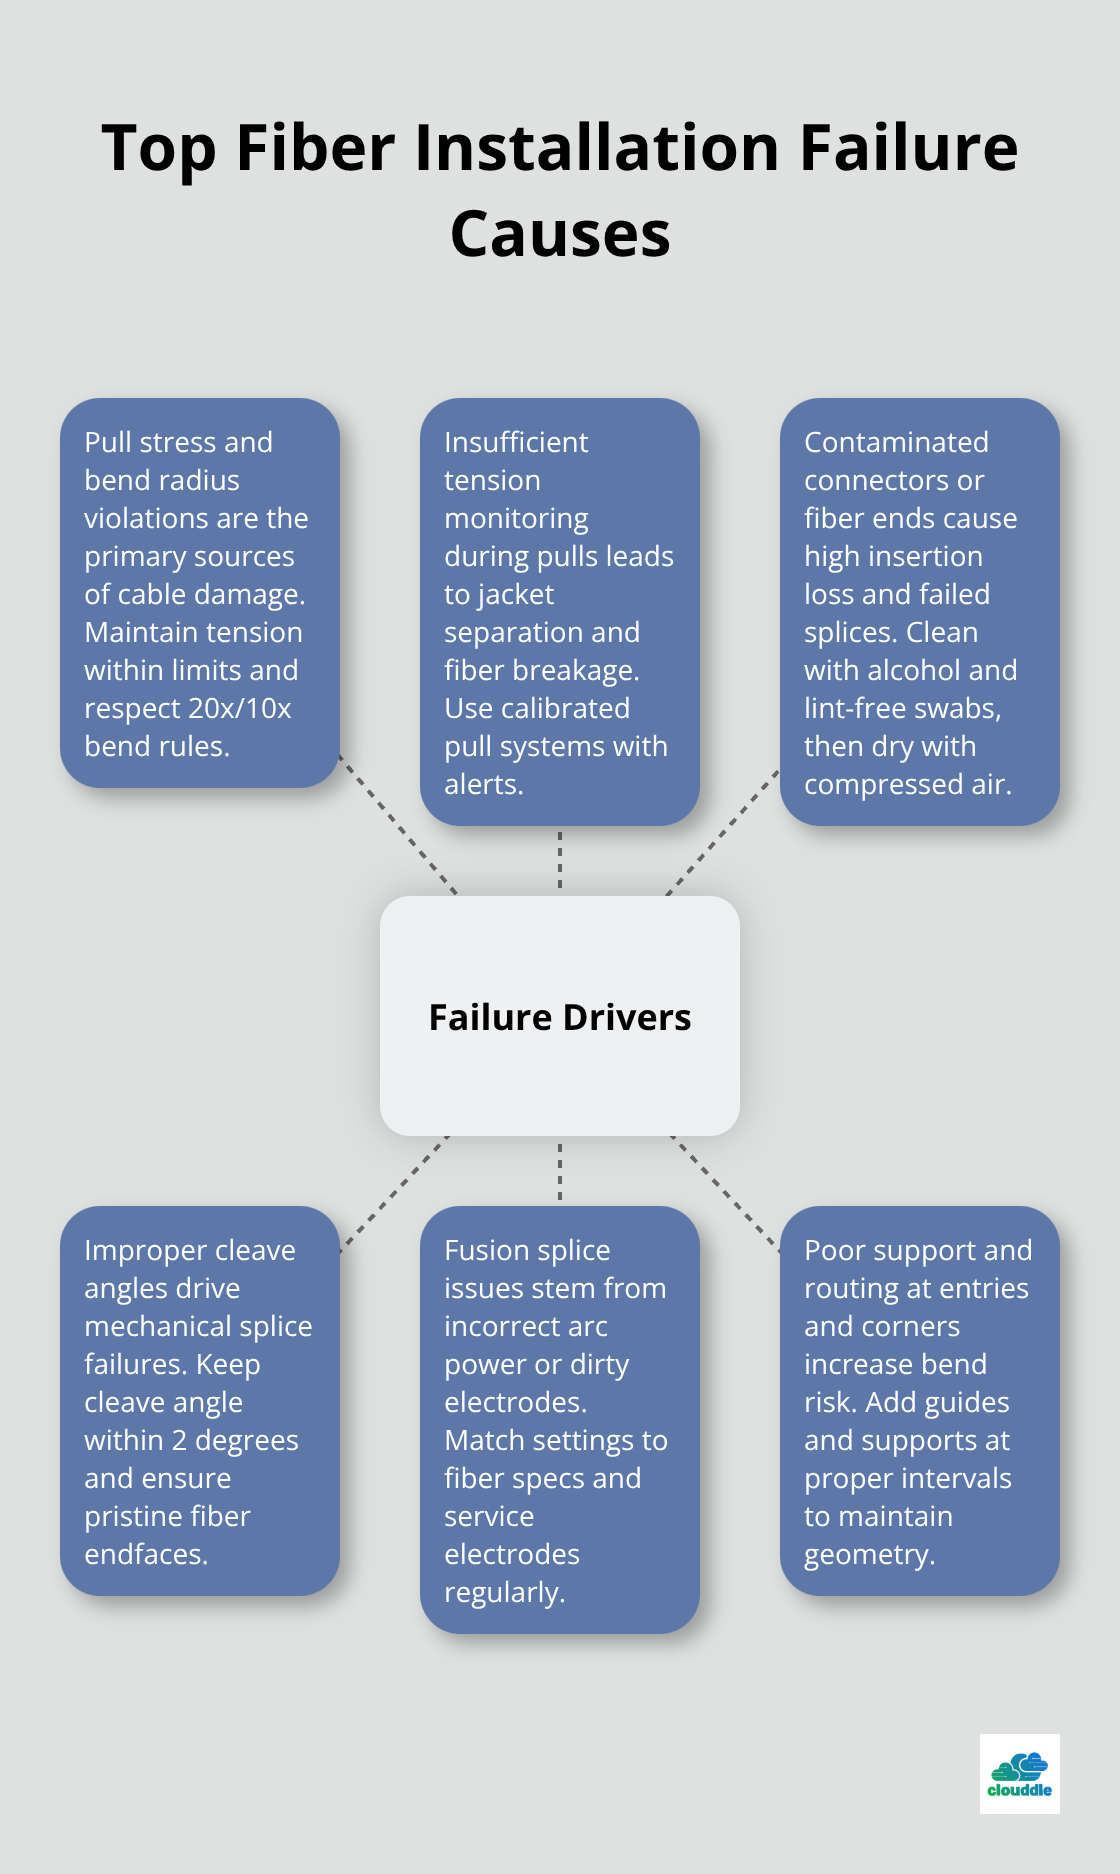
Cable damage occurs in 60% of failed fiber installations according to Fiber Optic Association data, with pull stress and bend radius violations accounting for the majority of these failures. Professional technicians prevent damage when they monitor pull tension continuously with calibrated systems that alert operators as forces approach safe limits for standard single-mode cable. The most effective approach involves pull grips attached to strength members rather than the cable jacket, which distributes stress evenly and prevents jacket separation that leads to fiber breakage.
Tension Control and Bend Radius Management
Tension control systems from manufacturers like Greenlee and Klein Tools provide real-time feedback that prevents the 80% of cable damage that occurs during the pull phase. These systems cost $2,000-4,000 but eliminate an average of $8,500 in rework costs per damaged cable run. Bend radius violations happen most frequently at cable entry points and around corners, where installers must maintain the 20 times the cable diameter rule during installation and 10x during operation.
Professional installations use bend radius guides and cable supports every 6 feet in horizontal runs to maintain proper geometry. Vertical installations require support every 150 feet with controlled slack loops that accommodate thermal expansion without bend limit violations.
Connection Quality and Signal Loss Issues
Signal loss above 0.5 dB per splice indicates contamination or alignment issues that require immediate correction. OTDR tests reveal the exact location of problems within ±1 meter accuracy, while power meter readings confirm insertion loss values. Dirty connectors cause network failures, which makes proper cleaning protocols essential for reliable connections.
Professional clean procedures involve alcohol-based solutions and lint-free swabs applied in a figure-eight pattern, followed by compressed air to remove residue. Mechanical splice failures typically result from improper cleave angles that exceed 2 degrees or contaminated fiber ends, while fusion splice problems stem from arc power settings that don’t match fiber specifications or dirty electrodes that require regular maintenance.
Final Thoughts
Professional fiber optic cable installation tools require substantial upfront investment but deliver measurable returns through reduced project timelines and eliminated rework costs. Quality equipment like precision cleavers, fusion splicers, and OTDR testing systems costs ,000-80,000 for a complete professional toolkit but prevents the ,500 average rework expenses that plague installations with inadequate tools. Projects that use proper fiber optic cable installation tools achieve 98% first-pass certification rates compared to 60-70% success rates for installations that compromise on equipment quality.
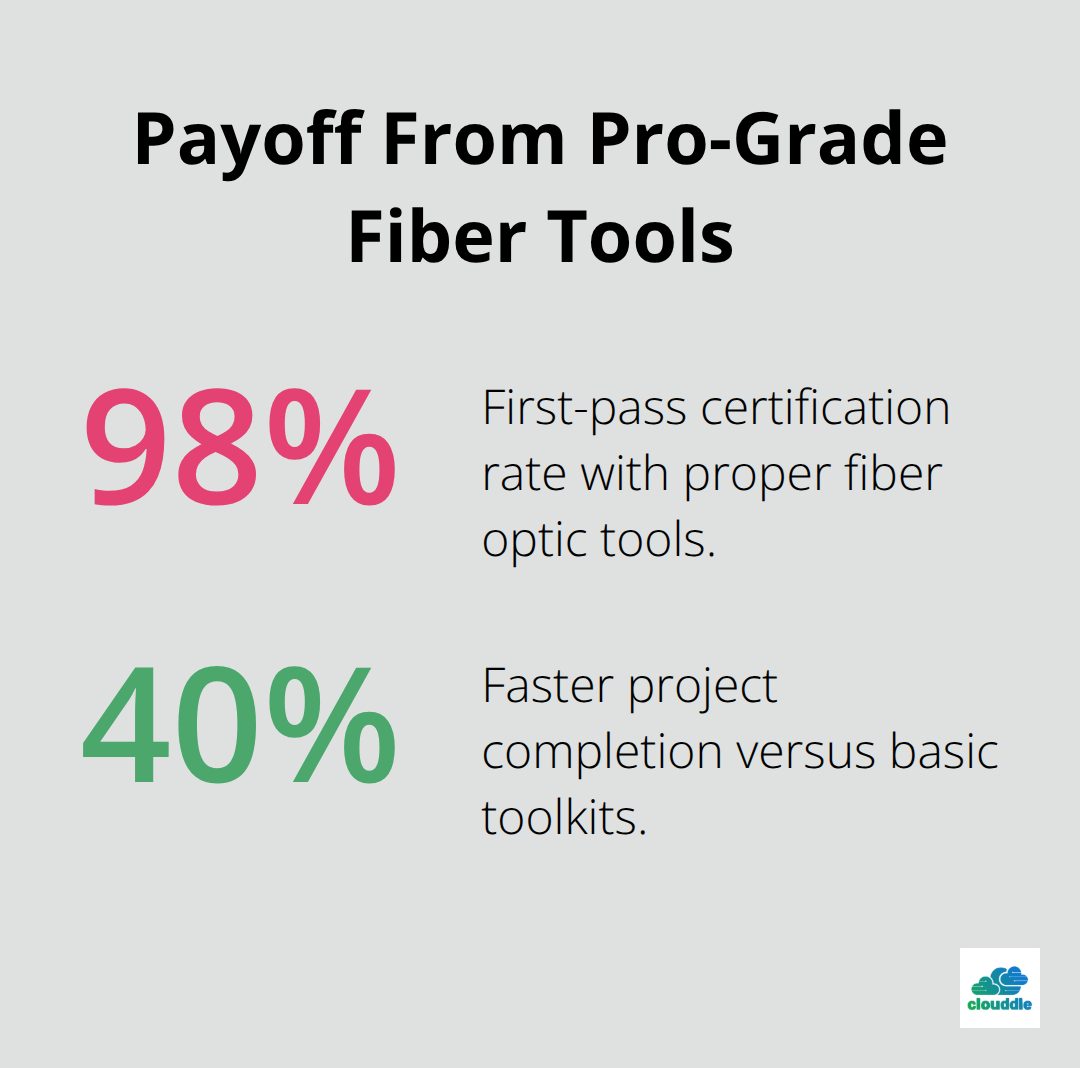
This performance difference translates directly to faster project completion, higher customer satisfaction, and improved profit margins for installation contractors. Professional-grade tools eliminate the guesswork and reduce human error that causes most installation failures. The data consistently shows that contractors who invest in quality equipment complete projects 40% faster than those who rely on basic tools.
We at Clouddle provide managed IT and networking solutions that complement professional fiber installations with ongoing support and maintenance. Our expertise helps businesses maintain peak network performance across hospitality, multi-family dwelling, and senior living environments. When you need enterprise-grade connectivity solutions, Clouddle delivers the technology stack and support required for seamless operations.

0 Comments