Fiber optic cable installation requires precision and proper technique to achieve optimal network performance. Poor installation practices can lead to signal loss, connection failures, and costly repairs.
We at Clouddle have seen countless installations go wrong due to simple mistakes that could have been avoided. This guide covers the essential steps and best practices for successful fiber optic installations.
Planning Your Fiber Optic Installation
Proper infrastructure assessment determines the success of your fiber optic installation before you pull a single cable. Calculate your exact bandwidth requirements based on current usage plus 50% growth capacity. The Fiber Broadband Association reports that 76.5 million U.S. homes now have fiber access, which makes accurate planning more important than ever.
Select Cable Type Based on Distance Requirements
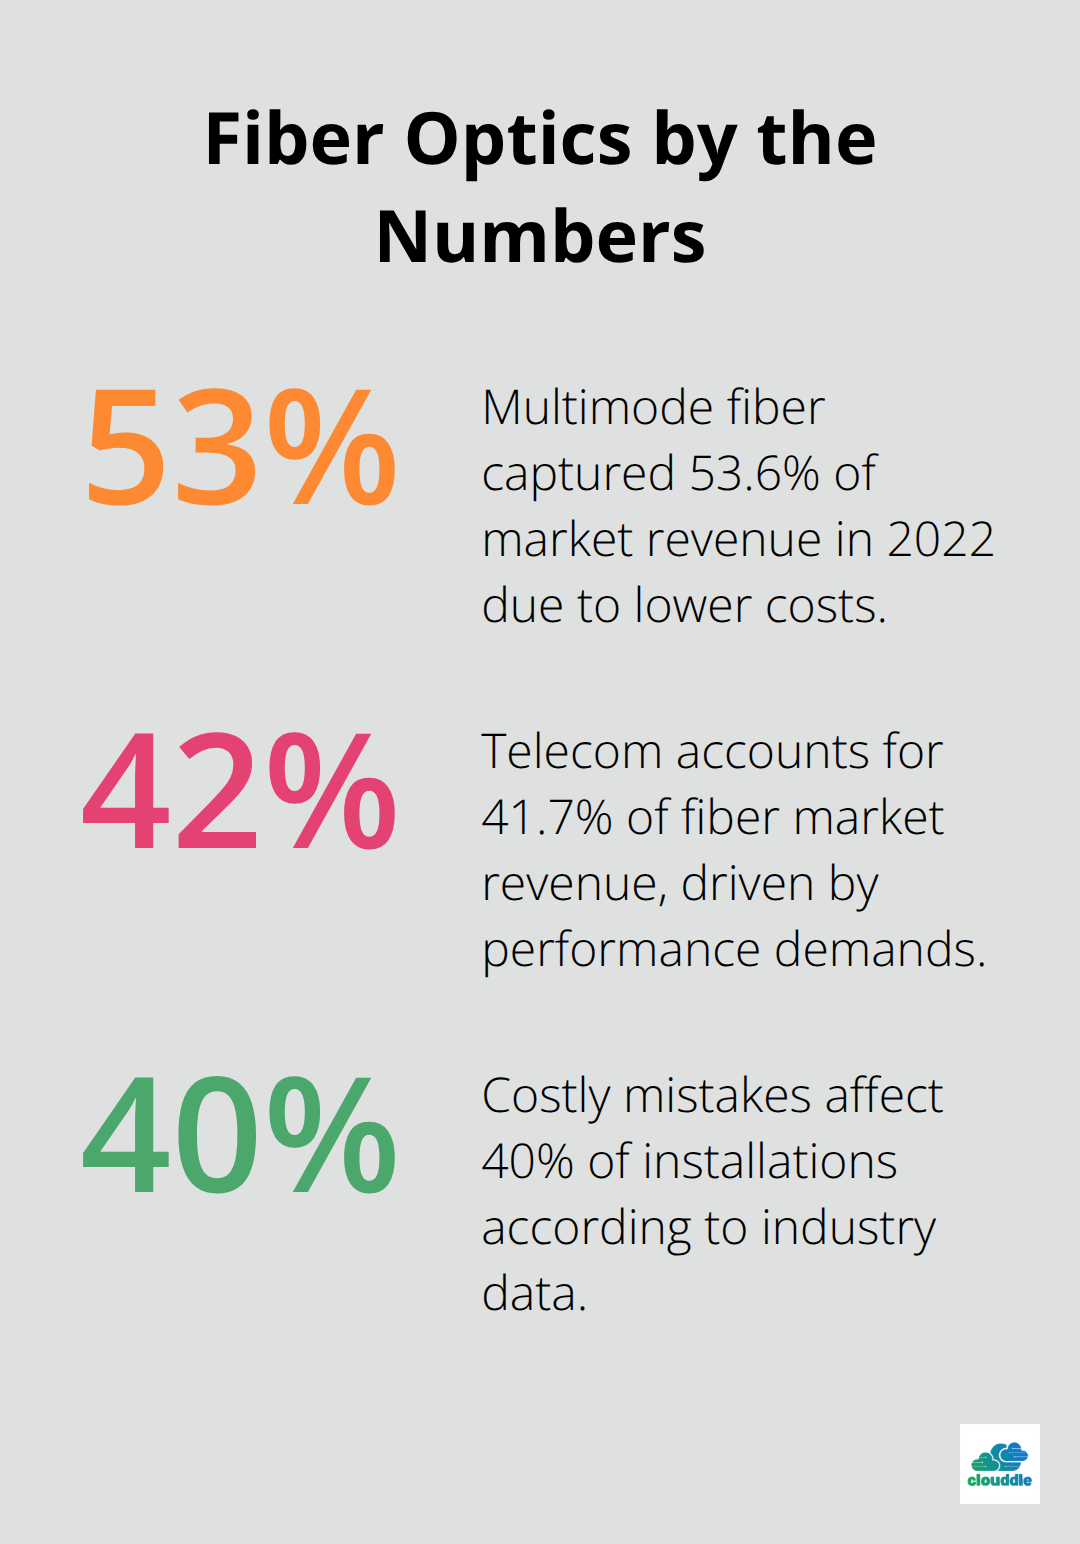
Single-mode fiber handles distances over 1 kilometer with minimal signal loss, while multimode fiber works best for runs under 300 meters in buildings. The multi-mode segment captured 53.6% of market revenue in 2022 due to lower costs, but single-mode provides better long-term value for most installations. Choose OS2 single-mode for outdoor runs and OM4 multimode for indoor applications. Cable count should match your port requirements exactly – order extra strands costs more upfront but prevents expensive retrofits later.
Gather Essential Tools That Prevent Installation Failures
Professional installations require specific equipment that amateur tools cannot replace. Your toolkit must include a fusion splicer for permanent connections, optical time-domain reflectometer for tests, and fiber cleaver for precise cuts. The TiniFiber dedicated micro armor remover speeds installation while it preserves fiber integrity. Quality cable strippers, microscopes for connector inspection, and proper supplies prevent the contamination that causes connection problems. Professional-grade tools reduce installation time and eliminate costly callbacks for repairs.
Map Your Installation Route
Survey the complete cable path from source to destination before you start installation. Identify obstacles like HVAC systems, electrical conduits, and structural barriers that affect cable placement. Document all turns, elevation changes, and access points (including ceiling tiles and wall penetrations). Measure distances accurately – mistakes in cable length calculations create expensive delays and material waste. The route you choose directly impacts installation complexity and long-term maintenance access.
Step-by-Step Fiber Optic Cable Installation Process
Prepare and Secure Your Cable Pathways
Clear all pathways completely and install proper cable support systems before you begin installation. Install cable trays at 6-foot intervals for horizontal runs and place J-hooks every 4 feet for vertical drops. The global optical fiber market reached .76 billion in 2022 according to Grand View Research, which makes pathway preparation more critical than ever for successful installations.
Remove all debris, sharp edges, and obstacles that could damage cables during the pull. Mark all penetration points and drill holes at least 25% larger than cable diameter to prevent jacket damage.
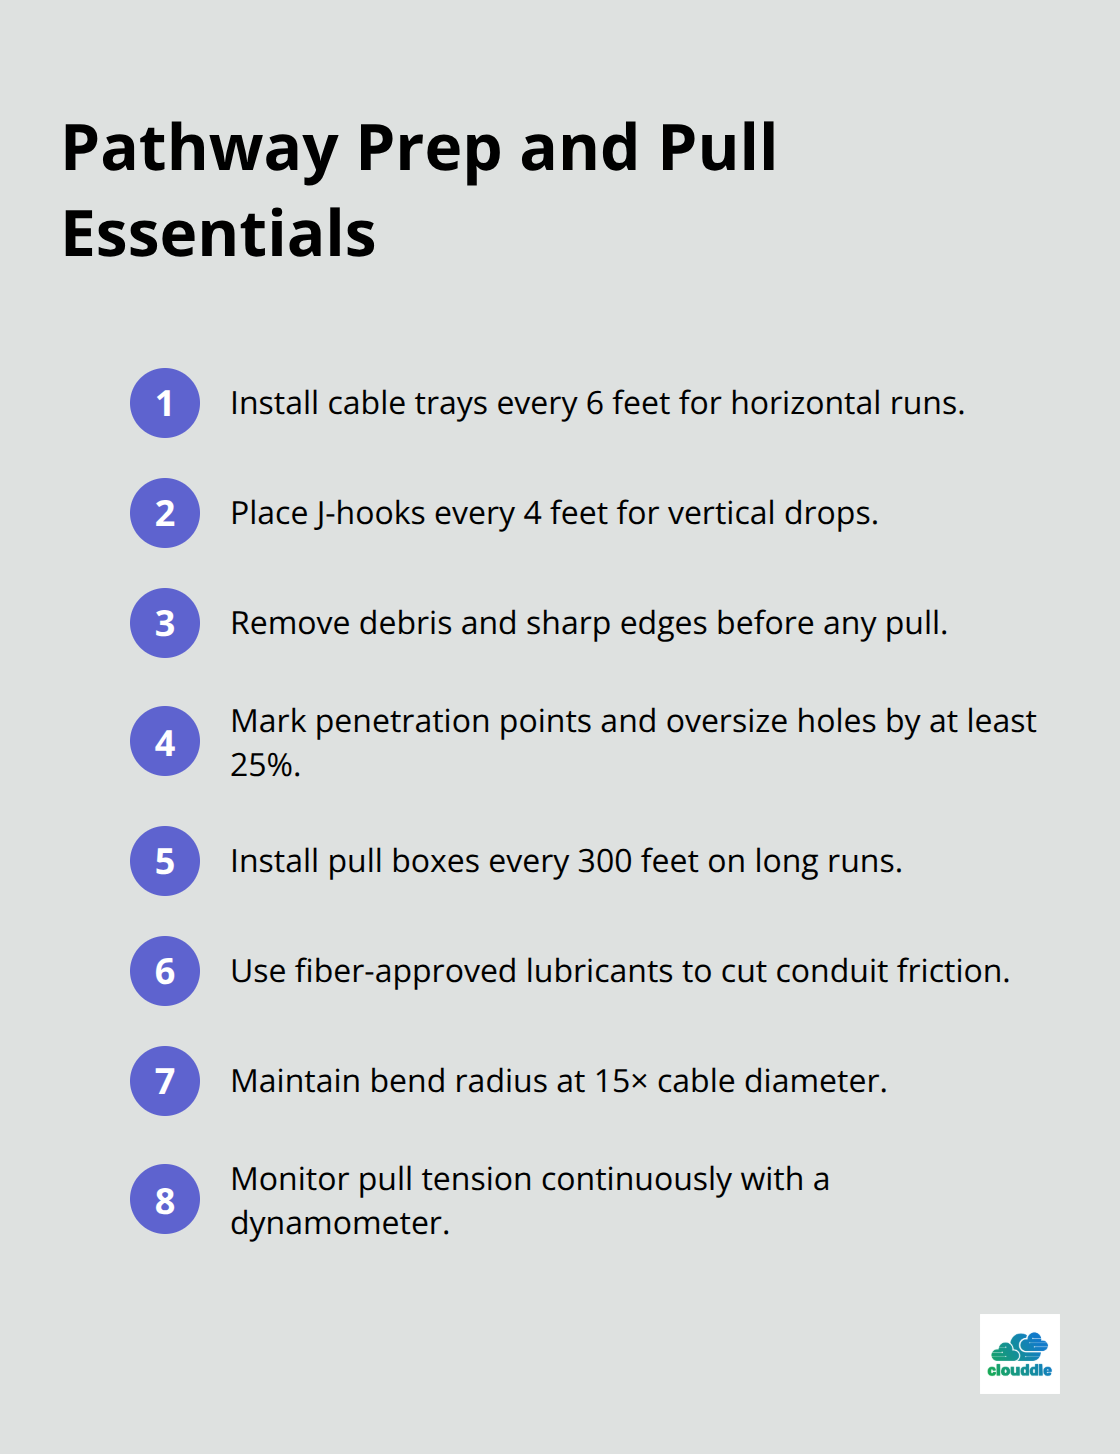
Install pull boxes every 300 feet on long runs to reduce tension below the 600-pound maximum that damages fiber cores.
Execute Controlled Cable Pulls with Proper Tension Management
Never exceed 25-pound tension on indoor cables and 600 pounds on outdoor armored cables during installation. Use lubricants specifically designed for fiber optic cables to reduce friction in conduits. In 2023, approximately 1.2 billion kilometers of fiber optic cabling were deployed worldwide, which proves that proper techniques prevent most installation failures.
Install cables in figure-eight patterns in pull boxes to maintain bend radius requirements (typically 15 times the cable diameter). Monitor tension continuously with a dynamometer and stop immediately if resistance increases suddenly. Pre-lubricate all conduit runs and use proper grips that distribute force evenly across the cable jacket.
Terminate Connections with Precision Methods
Terminate each fiber strand with fusion splices for permanent connections or mechanical connectors for temporary links. Clean all fiber end faces with alcohol wipes and inspect under 400x magnification before you splice. Test each connection immediately with an optical time-domain reflectometer to verify splice loss remains below 0.1 dB.
The telecom segment accounts for 41.7% of fiber market revenue due to demanding performance standards that require perfect terminations. Document all splice locations and test results for future maintenance access. Complete end-to-end tests with light sources and power meters to confirm total system loss meets specifications before you energize the network. For aerial installations, additional weatherproofing steps are essential.
Even perfect installation techniques can fail if you make common mistakes that damage cables or degrade performance during the process. Having the right installation tools ensures professional results every time.
Common Installation Mistakes to Avoid
Bend Radius Violations Cause Immediate Signal Loss
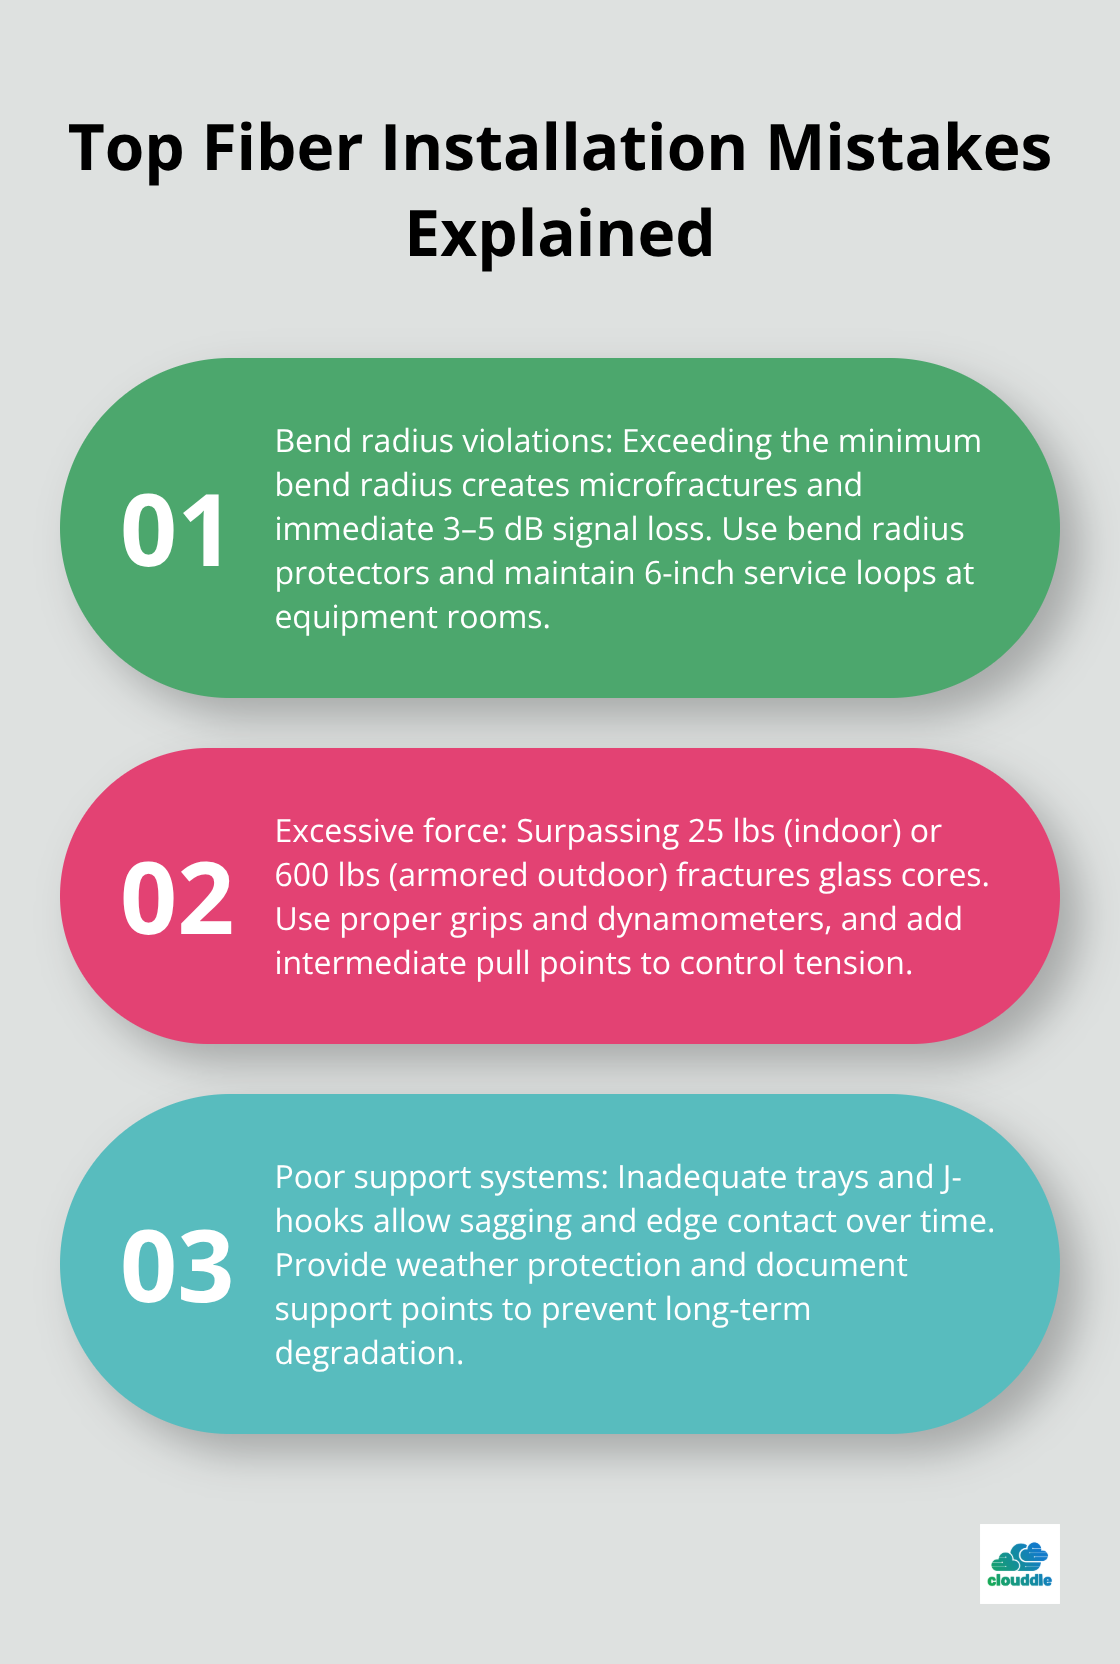
Fiber cables break permanently when you bend them beyond their minimum bend radius, which equals 15 times the cable diameter for most installations. A standard 12-strand cable with 3mm diameter requires bends no tighter than 45mm radius. Bend radius violations remain a significant cause of installation failures worldwide according to reliability studies.
Tight turns around corners, improper coils in splice boxes, and vertical drops through small openings create microfractures that reduce signal strength by 3-5 dB immediately. You must install bend radius protectors at all transition points and use service loops with 6-inch minimum radius in equipment rooms.
Excessive Force Destroys Cable Cores
Cable manufacturers specify maximum tension limits for good reason – when you exceed 600 pounds on armored outdoor cables or 25 pounds on indoor cables, you fracture the glass cores inside. The global fiber market reached $1.05 billion in 2024 with growth driven by proper installation techniques, not repairs from damaged cables.
Use mechanical grips that distribute force across the entire jacket rather than tape wraps that create stress points. Monitor tension continuously with calibrated dynamometers and stop pulls immediately when resistance spikes. Pre-lubricate all conduit runs with fiber-approved lubricants and install intermediate pull points every 300 feet to reduce total system tension.
Poor Support Systems Create Long-Term Failures
Inadequate cable support leads to gradual performance decline as gravity and environmental stress damage fibers over months or years. Install cable trays every 6 feet for horizontal runs and J-hooks every 4 feet for vertical installations to maintain proper support space.
Loose cables in ceiling spaces eventually sag and contact sharp edges or get damaged when maintenance work occurs. Weather protection becomes critical for any cables exposed to temperature changes – thermal expansion without proper slack loops creates tension that breaks fibers (especially during winter freeze-thaw cycles). Document all support points and protection measures for future maintenance teams who need safe access without disturbing active cables.
Final Thoughts
Successful fiber optic cable installation requires meticulous planning, proper tool selection, and strict adherence to handling procedures. The techniques covered in this guide prevent the costly mistakes that plague 40% of installations according to industry data. Accurate route mapping, controlled cable pulls under 600-pound tension limits, and precise termination methods form the foundation of reliable network performance.
Professional installation services become essential when projects involve complex routes, fusion splices, or mission-critical applications. The fiber optics market’s growth to .93 billion by 2030 reflects increased demand for expert installation capabilities that amateur approaches cannot match. Quality installations require both technical expertise and reliable support systems.
We at Clouddle provide comprehensive technology solutions that include professional data cabling services and managed networking support. The investment in professional installation pays dividends through reduced downtime and lower maintenance costs. Network reliability supports business growth for years after installation completes (when done correctly from the start).